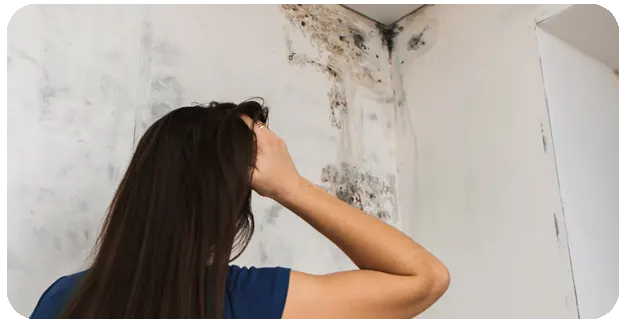
Finding mold on your walls or ceilings is never a pleasant experience. We’ve all been there, and it’s frustrating. The good news is that you can often tackle this problem yourself. We’ll walk you through everything you need to know to safely and effectively remove mold spores from walls. From spotting the early warning signs to preventing it from coming back, we’ve got you covered. Let’s get your home clean and healthy again.
What Causes Mold On Walls and Ceilings
It loves moisture, plain and simple. When water gets trapped in your home, spores start growing fast. Common culprits include leaky pipes, roof damage, or poor ventilation in rooms like your bathroom or basement. Even condensation from everyday activities can create the perfect environment for a mold problem. Before you can remove mold on walls effectively, you need to understand what caused it.
Temperature plays a significant role, too. Warm, humid spaces are like a playground for growth. If you’ve got damp spots that never seem to dry out, that’s where trouble starts. Understanding these causes helps you stop the problem before it gets worse. Once you know what’s feeding it, you can cut off its supply and remove it for good.
Signs of Mold In Your Home
Spotting fungi early saves you time and headaches down the road. The most obvious sign is visible spots on your surfaces. These can be black, green, white, or even orange. Don’t ignore them, even if they seem small. Fungus growing in one spot usually means there’s more hiding nearby. The sooner you identify these signs, the easier it is to remove mold growing on walls.
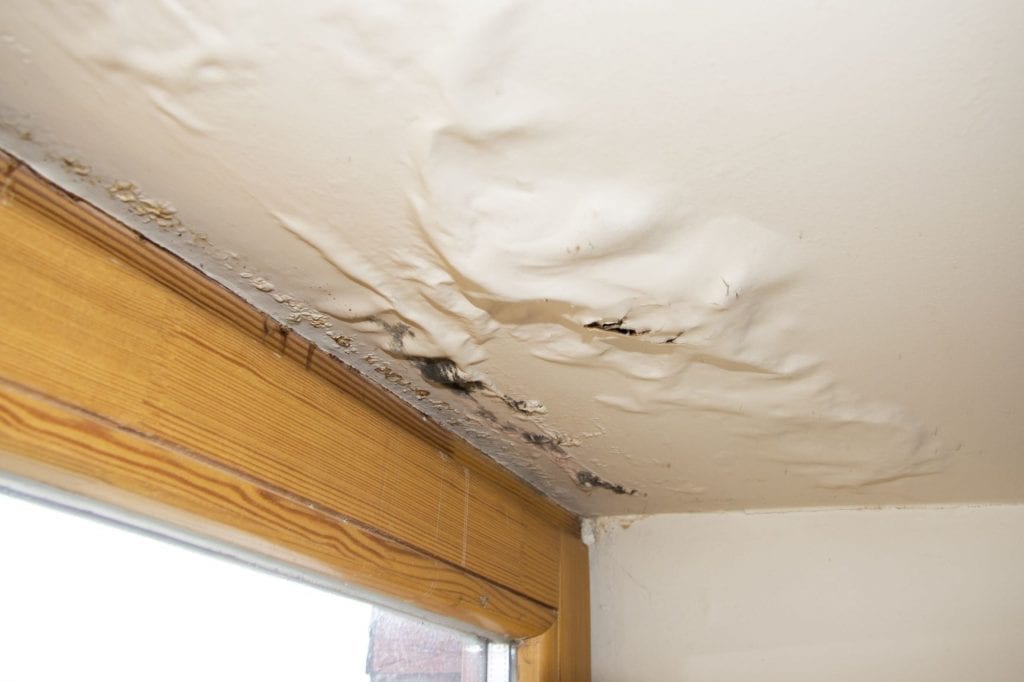
Your nose knows, too. That musty, earthy smell is a dead giveaway. If a room smells off even after cleaning, you might have hidden signs of it inside the walls or ceilings. Watch for peeling paint or wallpaper, which often signals moisture buildup underneath. Water stains and bubbling surfaces are red flags that shouldn’t be ignored. These warning signs tell you it’s time to remove mold on walls immediately.
How To Remove Mold On Walls Step-by-Step
Ready to tackle this project? The process to remove mold on walls isn’t complicated, but you need the right approach. First, protect yourself with gloves, goggles, and a mask. It isn’t something you want to breathe in. Open windows to get fresh air flowing through the space. Proper preparation makes it much easier to remove mold on walls.
Start by mixing a cleaning solution. For most surfaces, a mixture of water and detergent works great. You can also use white vinegar or specialized mold remover products. Spray the affected area generously and let it sit for about 10 minutes. Then scrub with a stiff brush until the stains disappear. Wipe everything down with clean water and dry thoroughly. This method helps you remove mold on walls without harsh chemicals.
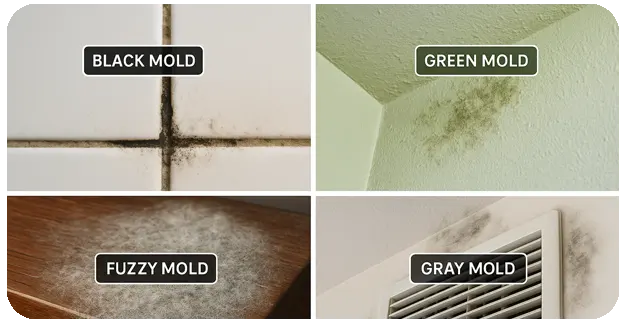
Identify The Type Of Mold
Not all is created equal. Some types are relatively harmless, while others require serious attention. Black receives a lot of attention, and for good reason. It can cause health issues and needs careful handling. However, many household versions are less dangerous but still need to be addressed. Knowing what you’re dealing with helps you remove mold on walls more safely.
Look at the color and texture. Powdery white stuff might be efflorescence, not mold. Green or black patches that feel slimy are usually the real deal. If you’re dealing with a large infestation (more than 10 square feet), consider getting professional help. They can test and identify exactly what you’re facing before you attempt to remove mold on walls yourself.
Get Rid Of Mold Safely
Safety comes first when you’re doing the removal yourself. Never mix cleaning products, especially bleach and vinegar. This creates toxic fumes that are extremely dangerous. Stick with one cleaning method at a time. Make sure the room is well-ventilated throughout the entire process. Taking these precautions ensures you can remove mold infestation on walls without health risks.
Here’s what you need for safe removal:
- Protective gloves, eye protection, and an N95 mask
- Scrub brush with stiff bristles
- Cleaning solution (detergent, vinegar, or commercial product)
- Clean rags and spray bottles
- Plastic bags for disposing of contaminated materials
For stubborn spots, you might need to scrub harder or apply the solution multiple times. Once you remove mold on walls successfully, bag any materials you used and seal them tightly. Wash your clothes separately from other laundry afterward. Don’t skip these steps when you remove mold on walls.
Preventing Mold Growth After Removal
Getting rid of this is only half the battle. You need to prevent it from returning, or you’ll be fighting the same fight in a few months. The key is controlling moisture in your home. Fix any leaks immediately, whether they’re from pipes, roofs, or windows. Even small drips add up over time and force you to remove black mold on walls repeatedly.
Keep your home’s humidity below 60 percent. You can buy an inexpensive hygrometer to monitor levels. Use exhaust fans when cooking or showering. These simple habits make a huge difference. Regularly clean areas prone to moisture buildup, especially in your bathroom and basement. Prevention is easier than having to remove mold on walls again later.
Improve Ventilation and Reduce Damp
Good airflow is your best defense against future problems. Open windows whenever the weather permits to let fresh air circulate. In rooms without windows, like some bathrooms, run exhaust fans for at least 20 minutes after showering. This pulls out the humid air before it settles. Better ventilation means you won’t need to remove mold on walls as often.
Dehumidifiers work wonders in naturally damp spaces. Basements especially benefit from these devices. They pull moisture out of the air and prevent growth in your home before it starts. Don’t forget to empty the water reservoir regularly or set it up to drain automatically. This investment saves you from having to remove mold on walls constantly.
Keep Mold From Coming Back
Prevention is way easier than cleanup. Make a habit of checking common trouble spots monthly. Look behind furniture, under sinks, and around windows. Catching moisture early stops mold before it spreads. Move furniture away from walls slightly to allow air circulation behind it.
Paint can be your friend here. Special primers and paints add an extra layer of protection. They’re worth the investment in problem areas. Keep your home warm enough in winter to prevent condensation on cold surfaces. This simple step to prevent growth saves countless headaches and reduces how often you need to remove mold on walls.
When To Call A Professional Mold Remediation Company

Sometimes DIY methods aren’t enough. If you’re dealing with mold inside walls or extensive areas, professionals have the tools and expertise to handle it properly. A remediation company can assess the full extent of your problem and tackle it safely. They know exactly how to remove mold on walls in challenging situations.
Call the pros if you see mold covering more than 10 square feet. Also, reach out if you’ve tried to remove mold on walls, but it keeps coming back. They use specialized equipment to kill it at its source and test air quality afterward. Professional mold remediation might cost more upfront, but it saves money long-term by solving the problem completely. Your health and your home’s structural integrity are worth the investment.


Q: Can I use bleach to remove fungus on walls?
A: Bleach works on non-porous surfaces like tile, but it’s not great for drywall or wood. It only kills surface mold, not the roots growing inside porous materials. Vinegar or specialized mold removers penetrate deeper and work better for most wall types. If you do use bleach, never mix it with other cleaners, and make sure the area is well-ventilated.
Q: How do I know if I have fungal growth inside the walls?
A: Look for warped or discolored walls, peeling paint, and persistent musty odors. Water stains are another big clue. If you suspect hidden mold, you might need to cut a small inspection hole or hire professionals with moisture meters and thermal imaging cameras. Don’t ignore these signs, as mold inside the walls spreads quickly and causes structural damage.
Q: Is it safe to stay in my home while removing fungus?
A: For small areas (less than 10 square feet), it’s generally safe if you take proper precautions. Seal off the work area with plastic sheeting, wear protective gear, and ventilate well. For larger mold infestations, consider staying elsewhere during remediation. Children, elderly people, and those with respiratory issues should definitely avoid the area during cleanup.
Q: How long does it take for fungus to grow on wet walls?
A: Mold can start growing within 24-48 hours of water exposure. That’s why quick action is crucial after leaks or floods. The longer moisture sits, the bigger your mold problem becomes. If you’ve had water damage, dry everything within 24 hours to prevent mold from taking hold. Use fans, dehumidifiers, and open windows to speed up the process.
Q: What's the difference between different types of fungal growth?
A: Mildew is actually a type of mold, but it’s usually less serious. Mildew appears powdery and gray or white, often in damp areas like shower curtains. Mold tends to be fuzzy or slimy and comes in various colors like black, green, or orange. Both need moisture to grow, but mold typically indicates a more serious moisture problem. Either way, both should be cleaned up promptly.
Q: Will painting over the fungus solve the problem?
A: Absolutely not. Painting over mold is like putting a bandage on a broken bone. The mold will continue growing underneath and eventually break through the new paint. You must remove the mold completely and fix the moisture source before painting. Use mold-killing primer after cleanup, then apply mold-resistant paint. Skipping proper removal just delays the inevitable and makes the problem worse